The New Year is an ideal moment to plan a home renovation that increases natural light, improves thermal comfort, and opens living spaces to the outdoors; this guide shows how Korniche roof lanterns and Korniche bi-fold doors can deliver those outcomes. You will learn practical planning steps, timelines for 2026 projects, cost considerations, installation expectations, and design inspiration to help scope a January-start renovation that balances aesthetics and energy performance. Many homeowners aim to boost daylight, reduce heating bills, and create seamless indoor-outdoor flow, and targeted glazing upgrades—specifically slimline aluminium lanterns and aluminium bi-fold doors—address all three goals. This article maps the decision process from benefits and specifications to budgeting, product selection guidance, installation workflow, and 2026 trends, using clear checklists, comparison tables, and actionable timelines. Read on for a structured approach to plan a renovation that maximises daylight, secures high thermal performance, and retains clean modern sightlines while keeping project timelines realistic for the busy New Year season.
What Are the Key Benefits of Korniche Roof Lanterns for Home Renovations?
Korniche roof lanterns deliver measurable benefits for renovation projects by increasing natural light, offering slim sightlines for contemporary aesthetics, and providing strong thermal performance that helps reduce heating demand. These roof lanterns use high-performance glazing and thermally broken aluminium frames to achieve low U-values in the range noted by industry sources, producing improved comfort and lower energy use. The structural design also supports large spans without bulky frames, so rooms feel more open while remaining robust and weatherproof. Quick installation and award recognition for innovation make these lanterns an attractive option when planning a New Year project that needs predictable timelines and proven engineering.
Korniche roof lantern benefits at a glance:
- Korniche lanterns increase usable daylight and improve perceived space.
- Korniche lanterns achieve low U-values (~1.0–1.2 W/m²K) for energy-efficient glazing.
- Korniche lanterns combine slim sightlines and strong structural spans for modern aesthetics.
These highlighted benefits lead naturally to technical specifics and design guidance in the following subsections.
Korniche lantern specifications for straightforward comparison:
| Specification | Characteristic | Typical Value |
|---|---|---|
| Thermal performance | U-value for complete lantern (indicative) | ~1.0–1.2 W/m²K |
| Sightline | Frame profile and visible width | Slimline aluminium sightlines |
| Maximum span | Structural capability (indicative example) | Large spans such as multi-metre modules |
| Installation | Typical workflow advantage | Designed for quick installation |
| Recognition | Notable distinctions | Award-winning design innovation |
This comparison highlights the core technical attributes to weigh in design decisions and helps translate product features into practical renovation outcomes. Understanding these attributes prepares you to choose glazing and framing that match room orientation, insulation goals, and aesthetic priorities.
How Do Korniche Roof Lanterns Enhance Natural Light and Aesthetics?
A Korniche roof lantern enhances natural light by maximising glazing area and minimising frame sightlines, which increases daylight penetration and improves visual connection to the sky. Slim aluminium profiles create higher glass-to-frame ratios so rooms receive more diffuse daylight, which in turn reduces the need for artificial lighting during the day and improves the look and feel of interior finishes. Placement is critical: siting a lantern over primary activity zones such as kitchen islands, dining tables, or central living areas concentrates light where it matters most and can visually link split-level or open-plan spaces. Consider pairing the lantern with light-coloured finishes and well-placed interior reflectors to amplify daylight, and use illustrated before/after imagery to confirm proportion and scale during planning.
These composition choices naturally lead into decisions about thermal performance and how glazing selection affects both comfort and running costs.
What Thermal Performance Features Make Korniche Roof Lanterns Energy Efficient?
Korniche roof lanterns achieve high thermal performance through thermally broken aluminium frames and insulated glazing that lower heat transfer across the roof assembly, which is expressed as a reduced U-value for the complete lantern. U-values around 1.0–1.2 W/m²K indicate strong resistance to heat loss compared with traditional glazed rooflights, improving year-round comfort and helping to reduce heating consumption. Choosing triple glazing or higher-spec low-emissivity coatings will further improve thermal performance and reduce condensation risk, translating into long-term energy savings. When prioritising energy efficiency, match the lantern’s glazing specification to your overall roof and wall insulation strategy to avoid thermal bridges and to optimise payback over time.
Understanding installation logistics helps translate these efficiency gains into realistic project timelines and ensures thermal detailing is implemented correctly on site.
How Can Korniche Bi-Fold Doors Transform Your Indoor-Outdoor Living Space?
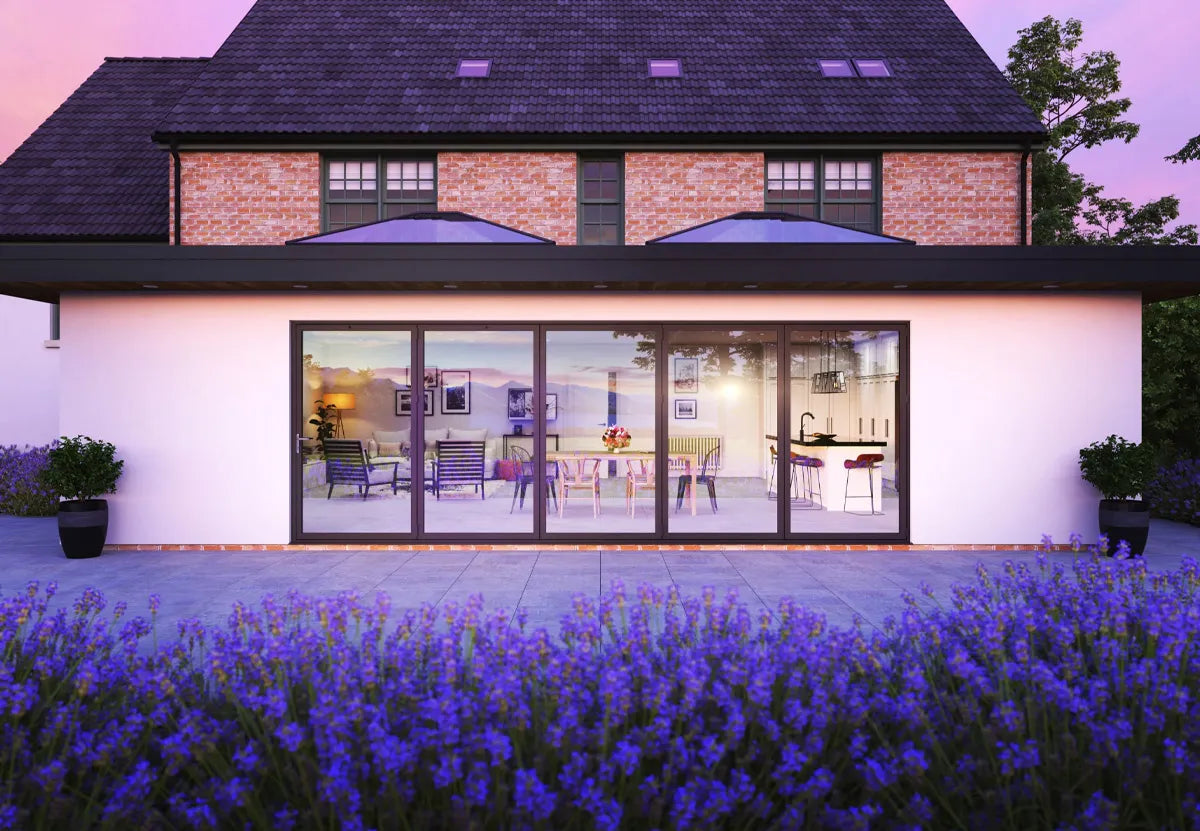
Korniche bi-fold doors transform indoor-outdoor living by creating expansive glazed openings that fold back to connect interiors with patios or gardens, expanding usable living space and improving ventilation in warmer months. Slim aluminium profiles maximise daylight and sightlines while maintaining the structural strength necessary for wide, multi-panel configurations; this combination supports design ambitions for open-plan living without heavy visual interruptions. High-security multi-point locks, shoot-bolt mechanisms, and internal glazing contribute to robust safety while pre-assembled delivery reduces on-site time and disruption, making bi-fold doors a practical choice for New Year renovations that need efficient turnaround. The result is a versatile opening system that supports entertaining, natural ventilation, and a stronger visual link to outdoor living.
Below is a quick configuration reference to choose the right bi-fold layout for specific use-cases.
| Configuration | Typical Max Width | Sightline / Material | Use-case |
|---|---|---|---|
| 2-panel (1+1) | Up to ~2.4 m | Very slim aluminium sightlines | Small openings and side exits |
| 4-panel (2+2) | Up to ~4.0 m | Slim aluminium profiles | Standard patio openings |
| 6+ panel (3+3 or sliding combinations) | Wide spans multi-metre | Slim but structurally robust | Full-width garden openings |
This configuration table helps match door layouts to room width, flow requirements, and desired sightlines so you can refine choices before site measurement and ordering.
What Security Features Do Korniche Bi-Fold Doors Offer for Home Safety?
Korniche bi-fold doors prioritise security through multi-point locking systems, shoot-bolt mechanisms on meeting stiles, and internal glazing options that increase resistance to forced entry, providing homeowners with confidence in both daytime openness and nighttime security. These hardware elements distribute locking points across the frame to reduce leverage and prevent quick disengagement, while robust aluminium profiles contribute to overall rigidity under load. For higher-security requirements, selecting doors with certified multi-point locking and reinforced meeting stiles is essential; these options integrate seamlessly without sacrificing slimline sightlines. Choosing high-spec security hardware early in the specification process avoids later trade-offs between appearance and protection.
Choosing the right configuration also impacts sightlines, sealing performance, and interaction with threshold detailing, which are covered in the next subsection.
Which Design Options and Configurations Are Available for Korniche Bi-Fold Doors?
Korniche bi-fold doors come in multiple configurations, panel counts, and finish options—including dual-colour RAL selections—so you can match exterior appearance and internal decor while maintaining clean sightlines and consistent performance. Bespoke sizing allows flush thresholds, corner configurations, and various opening directions to suit patios, terraces, and corner transitions, enabling both inward and outward folding systems to fit site constraints. Material choices focus on durable aluminium frames with thermal breaks to balance strength and insulation, while powder-coated finishes provide long-term colour stability. When planning door placement, prioritise flow, furniture layout, and sightline from key interior vantage points to ensure the configuration enhances daily use as well as visual impact.
These design considerations flow into the essential steps and timeline planning needed to deliver the renovation in the New Year season.
What Are the Essential Steps for Planning Your New Year Home Renovation Project?
Effective New Year renovation planning starts with clear goals: define whether the primary objective is more daylight, improved energy efficiency, or enhanced indoor-outdoor access, and use those priorities to guide product selection and budget allocation. Early-stage tasks include on-site surveys, thermal performance targets, and scheduling decisions to align with supplier lead times and installer availability for the 2026 season. Permits and structural checks should be confirmed before ordering bespoke lanterns or wide bi-fold assemblies to avoid delays, and contingency windows ought to be built into timelines for finishing trades. Engaging installers for accurate site measurement and preliminary cost estimates early in the process reduces scope creep and helps keep the project on track.
A practical timeline helps translate these planning steps into executable milestones and sets expectations for procurement and delivery.
- Initial project definition and site survey completed within 2–3 weeks.
- Product selection, specification, and quotation phase taking 2–4 weeks.
- Permitting, ordering, and fabrication lead time of 6–12 weeks depending on specification.
- On-site installation and finishing phase scheduled for 1–3 weeks per major element.
This timeline clarifies how long each phase typically takes and supports decision-making when aiming for a renovation start in early 2026.
How to Budget and Schedule Your Renovation for 2026 Success?
Budgeting for a 2026 renovation requires factoring in the primary cost drivers, size, glass specification, frame finish, installation complexity, and any structural work—while scheduling must account for manufacturing lead times and seasonal installer demand. Create a budget matrix that separates materials, bespoke fabrication, labour, and contingency to capture realistic total costs and avoid surprises; include a minimum contingency of around 10% for unexpected structural findings. Schedule priorities include securing site surveys and measurements before busy periods and ordering long-lead components as soon as planning approval and specification are confirmed. Early engagement with installers for upfront availability checks helps align your desired timeline with actual booking windows, reducing the risk of seasonal delays.
A focused checklist will help align decisions with both budget and schedule constraints.
- Identify core priorities such as daylight, thermal targets, or maximum sightlines.
- Confirm structural work and permit needs before placing orders.
- Lock in glazing and finish options to avoid fabrication delays.
Completing these steps positions your project for a smooth procurement and installation phase.
How to Choose the Right Korniche Products for Your Renovation Goals?
Selecting the right Korniche product starts by matching project priorities to product attributes: choose a lantern glazing specification that meets your U-value target for energy savings, and pick bi-fold configurations that align with intended flow and sightlines. Use a decision checklist that weighs thermal performance, structural span, finish options, and security hardware to balance aesthetics and function; for energy-focused projects, prioritise lower U-values and insulated frames, while for visual impact prioritise larger spans with slim sightlines. Request detailed product specifications and ask for example case studies or technical sheets to confirm that selected options meet structural and thermal requirements. Finally, consult installers for on-site measurement and to verify that flashing, upstand, and threshold details will be executed to maintain thermal integrity.
For homeowners ready to proceed, consider these selection steps as the purchase gateway and a point to request formal quotes and installer availability.
How Does Installation of Korniche Roof Lanterns and Bi-Fold Doors Work?
Installation of Korniche roof lanterns and Korniche bi-fold doors follows a staged workflow that begins with precise measurement and structural verification, then moves through pre-fabrication and on-site integration to ensure weatherproofing and finish quality. Lantern installations require coordinated detailing of the roof upstand, flashing, and structural support to preserve thermal continuity, while bi-fold doors often arrive pre-assembled to reduce time at the property and streamline handling. On-site sequencing typically staggers trades so that lantern installation, glazing, and internal finishes proceed in logical order with minimal rework. Clear communication of timelines, site access, and snagging procedures ensures the project finishes to spec with predictable disruption.
A short checklist of pre-install checks prepares the site and aligns trades for efficient delivery and minimal delays.
- Confirm structural support and roof upstand dimensions with installer.
- Prepare site access and protect interior finishes before installation begins.
- Coordinate glazing and finishing trades to complete snagging promptly.
This coordination helps move directly into the specific installation sequences described below.
What Is the Typical Installation Process for Korniche Roof Lanterns?
Typical installation of a roof lantern begins with accurate site measurement and fabrication to match the roof upstand, followed by installation of a weatherproof base and flashing to integrate with the existing roof membrane. The lantern frame and glazing are then set in place and sealed using specified flashing systems and high-performance seals to prevent air and water ingress. After glazing, internal finishing focuses on insulation around the upstand, plastering, and final waterproof checks to protect thermal performance and avoid condensation issues. The process generally requires coordination between roofing, glazing, and finishing trades and can be completed quickly when pre-fabrication and on-site preparation are executed correctly.
Ensuring installers follow the manufacturer’s thermal detailing recommendations preserves the anticipated energy performance and longevity of the installation.
How Are Korniche Bi-Fold Doors Delivered and Installed Efficiently?
Korniche bi-fold doors are commonly delivered as pre-assembled units to reduce on-site assembly time and to minimise handling risk, allowing installers to lift and set complete frames into prepared openings. Efficient installation involves pre-verifying opening dimensions, preparing level thresholds, and ensuring lintel support is in place to accept the door weight while preventing distortion to the frame. On the install day, teams typically fit the frame, adjust panel alignment, commission multi-point locks and shoot-bolts, and complete weather-seal and threshold finishing—often within a day or two for standard openings. Final snagging checks address smooth operation, drainage, and aesthetic detailing, ensuring the doors meet security and thermal expectations.
This delivery and installation approach reduces disruption and helps keep the renovation timeline aligned with seasonal booking constraints.
What Are the Cost Considerations for Korniche Aluminium Bi-Fold Doors and Roof Lanterns?
Cost considerations for aluminium bi-fold doors and roof lanterns centre on four main drivers: size and number of panels or lantern spans, glazing specification (double vs triple and low-e coatings), frame finish and colour options (including dual-colour), and installation complexity such as structural alterations or waterproofing work. Fabrication lead times and bespoke sizing add to upfront costs, while higher-spec glazing increases both material expense and long-term energy savings potential. When budgeting, include installation labour, finishing trades for plaster and flooring, and contingency for unforeseen structural work. Evaluating total cost against projected energy savings and increased home value provides a clearer return-on-investment picture.
A straightforward cost-driver table clarifies typical ranges and where homeowners can make trade-offs between initial spend and long-term value.
| Cost Factor | Attribute | Typical Range / Value |
|---|---|---|
| Size & configuration | Panels or lantern span | Primary driver; larger spans increase cost |
| Glazing spec | Double vs triple, low-e coatings | Higher-spec glazing increases upfront cost but reduces energy use |
| Frame finish | Single vs dual-colour RAL options | Custom finishes add to fabrication lead time and price |
| Installation complexity | Structural modifications, flashing | Structural work significantly increases installation cost |
Breaking down costs by factor helps homeowners prioritise which specifications deliver the best balance of aesthetic impact and operational savings.
How Do Aluminium Bi-Fold Door Prices Compare in the Market?
Aluminium bi-fold door prices vary primarily by size, panel count, and glazing choice, with slimline high-performance systems typically positioned as premium options relative to standard profiles; however, their durability and low maintenance support longer-term value. Choosing higher thermal performance glazing will raise initial costs but can reduce annual heating bills, especially in temperate climates where glazing area is significant. Comparing quotes should focus on like-for-like specifications—frame thermal break, glass U-value, security hardware, and finishing options—to accurately assess market positioning. When evaluating quotes, consider pre-assembled delivery and installer experience as cost-effective trade-offs that can shorten site time and reduce labour variability.
Transparent price comparisons paired with energy-saving estimates help form a realistic expectation of payback timelines.
What Long-Term Savings Result from Energy-Efficient Korniche Products?
Energy-efficient lanterns and bi-fold doors with lower U-values reduce heating demand, which accumulates savings over time and contributes to a smaller carbon footprint; pairing quality frames with high-spec glazing improves living comfort and reduces energy bills. Reduced maintenance costs are another benefit of aluminium systems due to corrosion resistance and colour stability, lowering lifetime ownership costs compared with some alternative materials. Over a multi-year horizon, energy savings combined with increased property appeal can contribute to a favourable return on investment, particularly when replacements or major refurbishments were already planned. Tracking estimated annual heating savings against upfront incremental cost provides a simple payback metric to inform purchase decisions.
Estimating these savings accurately depends on local energy prices, existing fabric performance, and the exact U-values specified for the new glazing.
What Are the Latest 2026 Home Renovation Trends Featuring Korniche Products?
In 2026, renovation trends emphasise daylight maximisation, minimal visual clutter, sustainable materials, and smart-home integration—areas where slimline roof lanterns and aluminium bi-fold doors align well with homeowner goals. Designers increasingly pair large-span glazing with warm natural palettes and integrated shading to balance solar gain and glare control, while dual-colour finishes support contemporary exterior/interior coordination. Sustainability trends push higher-performance glazing and recyclable aluminium frames, and compatibility with smart shading and sensor-driven ventilation makes these glazing upgrades part of connected-home strategies. Highlighting these trends helps you specify products that remain current and resilient to future design shifts.
These trends naturally suggest sustainability measures and smart integration strategies you can apply to specific rooms; the next subsection covers those alignments in practical terms.
How Do Korniche Products Align with Sustainability and Smart Home Features?
Korniche products align with sustainability goals through low U-value glazing options and durable aluminium frames that reduce the need for frequent replacement, while smart-home compatibility allows integration with motorised blinds, sensors, and ventilation controls to manage comfort and energy use. Selecting higher-spec glazing contributes to lower heating energy demand, and using long-lasting aluminium minimises embodied replacement impacts over time. Smart shading and automated ventilation can be paired with lanterns and doors to control solar gain and indoor air quality automatically, improving both comfort and efficiency. When planning upgrades, consider wiring routes, sensor placement, and control interfaces early to ensure seamless smart integration without compromising lantern sightlines or door operation.
Design inspirations and practical photo subjects in the next subsection guide decisions about room placement and finishes.
What Design Inspirations Showcase Korniche Roof Lanterns and Bi-Fold Doors?
Design inspirations that showcase lanterns and bi-fold doors include kitchen extensions where a central lantern floods a cooking island with daylight, orangery-style projects that use lanterns to crown a new glazed volume, and full-width bi-folds that open a living room directly onto a patio. Styling tips include matching internal frame colours to adjacent cabinetry for continuity, using muted external finishes to blend with landscaping, and placing seating areas to take advantage of framed sky views. For photography, capture wide-angle before/after shots that show the change in daylight distribution, close-ups of slimline sightlines, and images that demonstrate integrated shading or threshold flushes. These visuals help stakeholders confirm proportion, finish, and the emotional effect of increased daylight and indoor-outdoor flow.
Imagery planning and clear specifications conclude the design process and help translators – designers, builders, and installers—deliver the intended outcome.
Share:
Roof Lanterns: The Complete Guide for UK Homeowners
How Korniche Roof Lanterns Keep the Chill at Bay: A Guide for Homeowners